

Turn Your Old Egg Cartons Into Colorful Fish: A Simple and Fun Craft Project with Items Found in Your Recycling Bin
Teach your kids about sustainability, transform trash into treasure, and spark imagination with this easy DIY that will get your creative juices flowing


Egg Carton Fish
With the price of eggs at an all-time high, you may as well get the most bang for your buck by making sculptures with the cartons instead of throwing them into the trash or recycling bin. Here’s a craft for our favorite way to repurpose and upcycle cartons and make them last a long time: turning them into bright and colorful fish that can be used as toys, decorations, or ornaments that you can hang anywhere.
Below is a step-by-step guide for making them, including a complete materials list. The best part is that if you have some egg cartons, you will probably have all the other materials around your home, so you can get cracking immediately!
Happy crafting!


Materials:
Egg cartons
Any paints, preferably acrylic, crayons, markers, paint markers like Posca
Brushes
String
Something to poke a hole with. We used an awl, but you can also drill a small hole.
Good scissors
Newspaper or drop cloth for an easy clean up
(Optional) Gesso primer is a basic primer for any acrylic paint. It can be found in any art supply store or on Amazon.


Step 1:
Save all your egg cartons. You can do this with one carton, but depending on how many you want to make, you may want a couple more.
Clear an area to work with and prepare it for making a bit of a mess
Step 2:
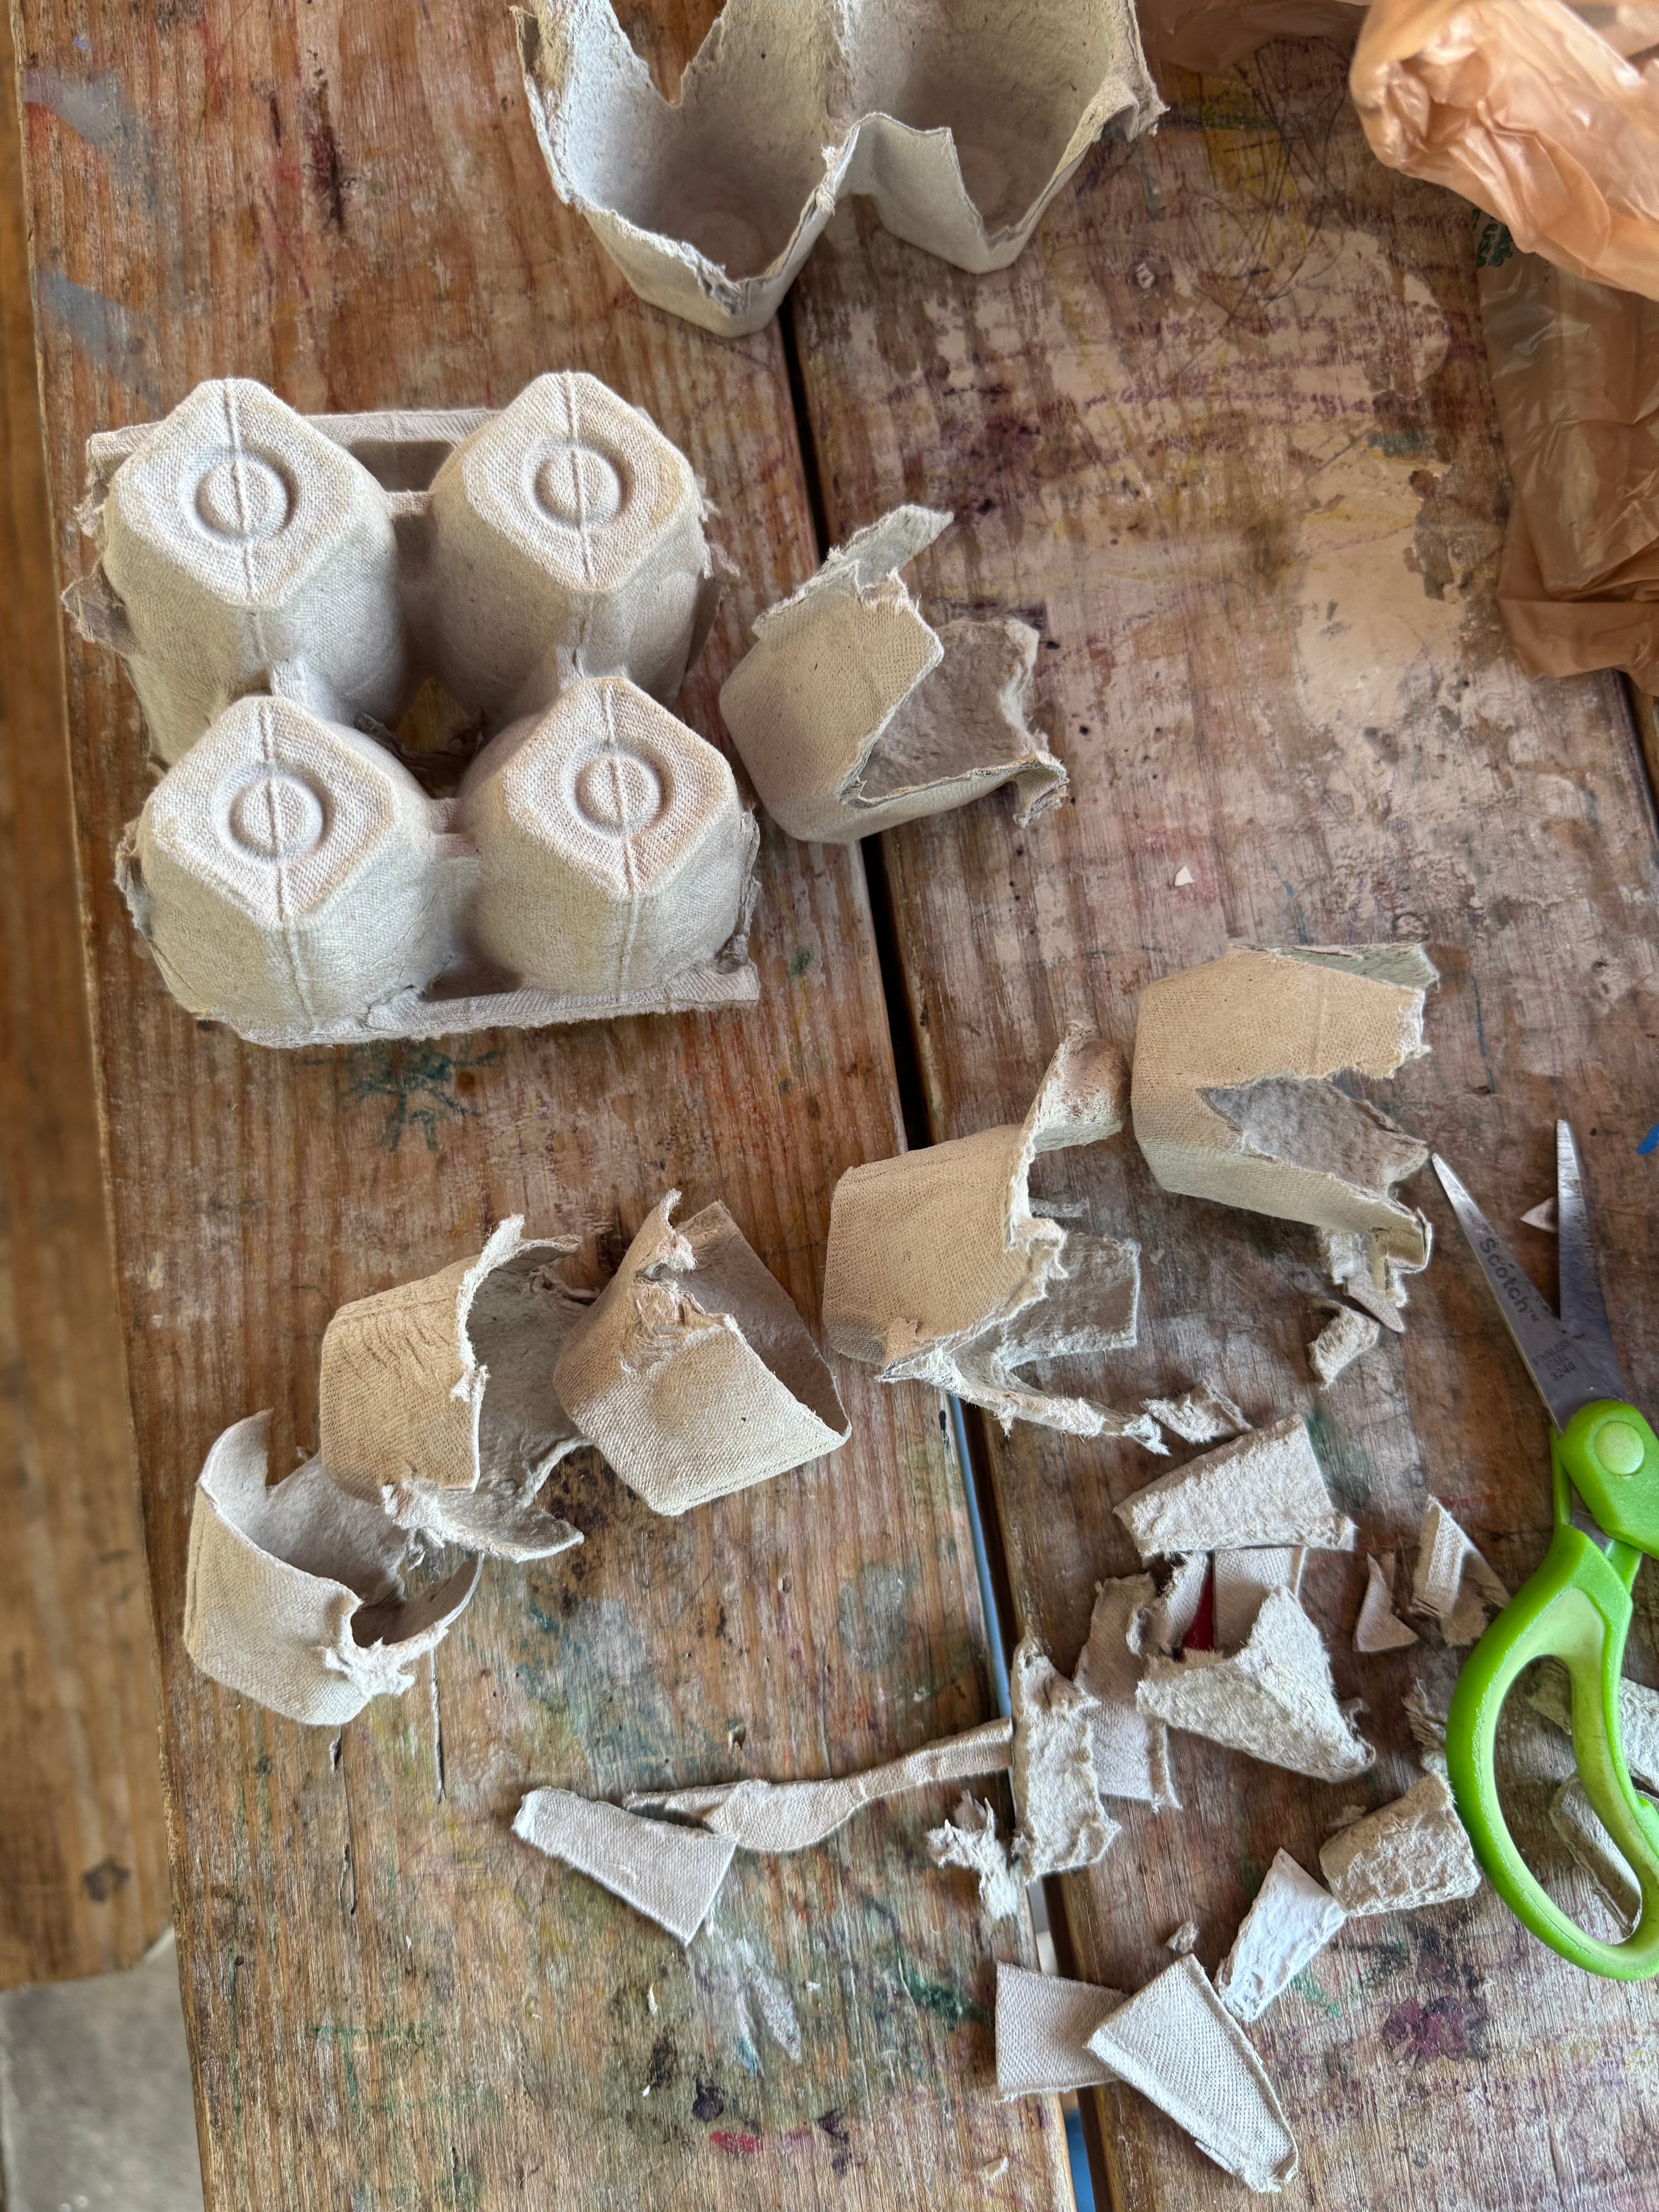
Carefully cut out each little egg holder to keep its shape as best as possible.
*TIP: Save the side connection points to make the tails later.
Step 3:
Prepare your messy area with some newspaper or a drop cloth you don’t care about. Set up a palette with Gesso if you have it. This is for priming each egg holder individually, making for more vibrant colors later. You do this by painting the gesso on and covering both the cups' inside and outside. You’ll have to wait for that to dry completely before painting the colors on. This can take a few hours unless you dry them in the sun. Use your judgment here, but make sure they are dry to the touch when applying the next layer of color. Be sure to prime the outside AND the inside. If you don’t have Gesso or enjoy the egg carton's natural color, you can skip this step and still have a great final product.
Step 4:
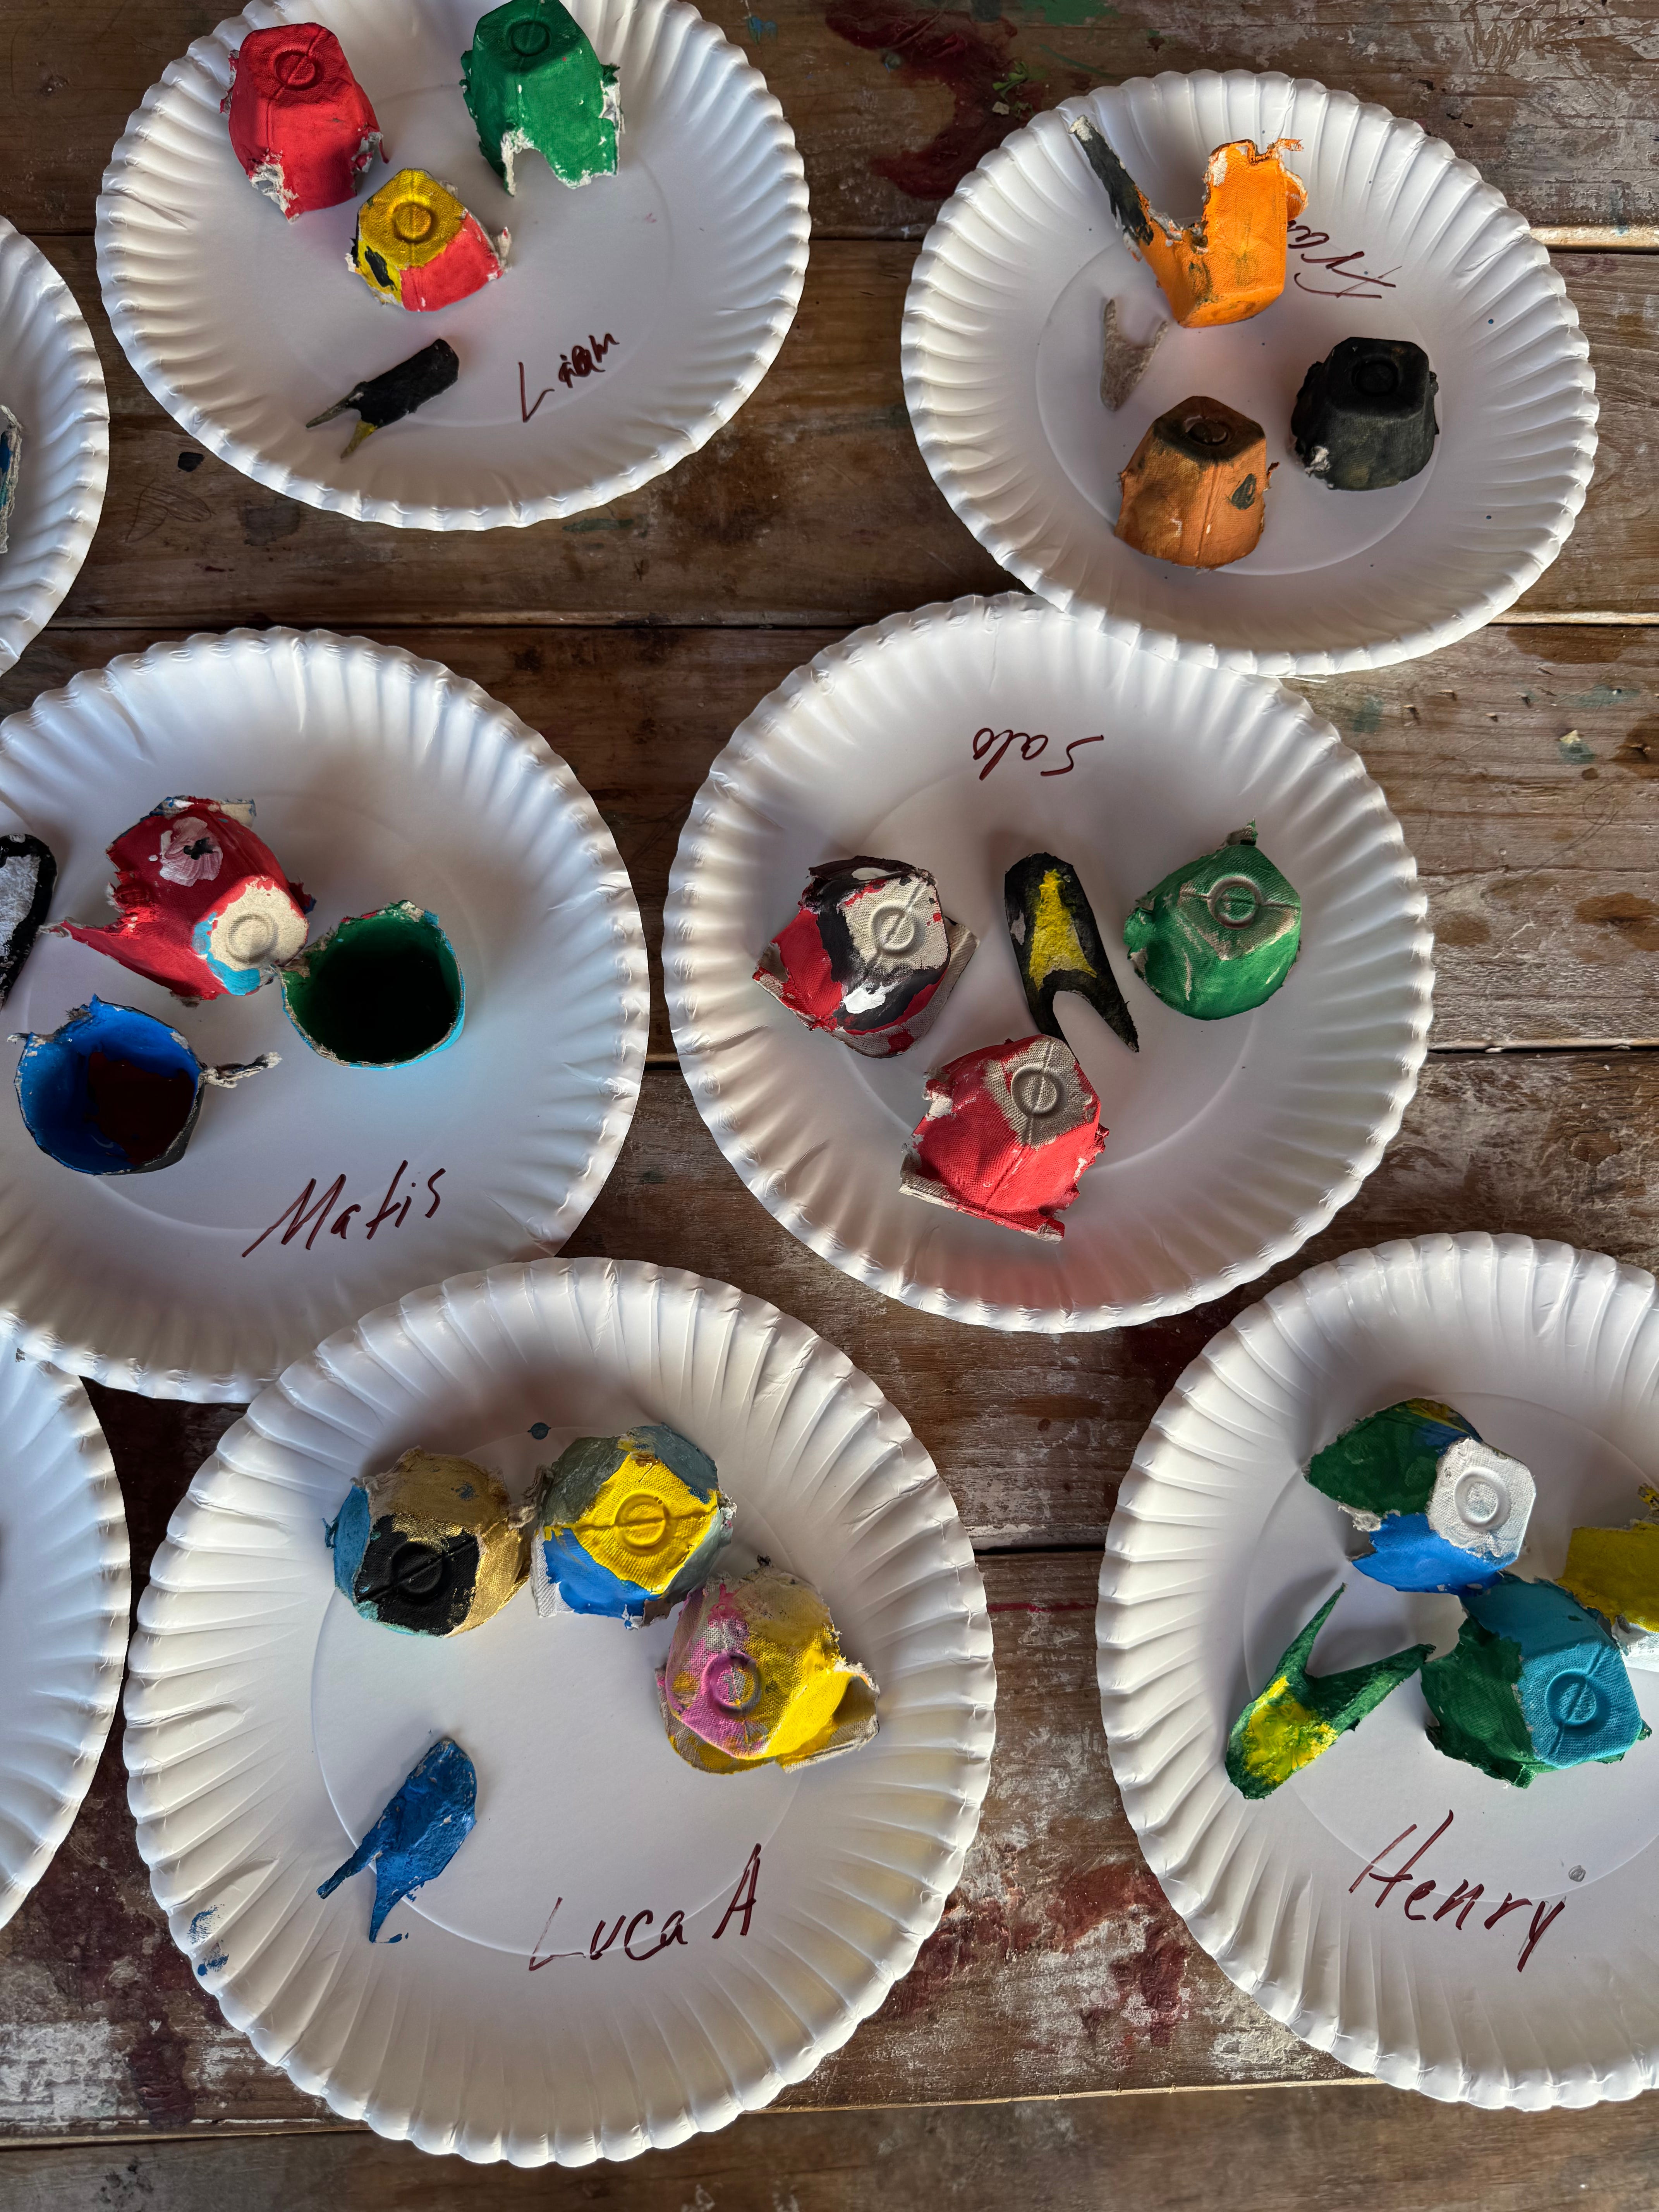
Set up a paper plate or palette and squirt various paint colors.
This is a fun opportunity to get creative and think about what you want to paint. How many fish are you making? If you’re making a lot, it’s a good time to prep all your pieces in gesso first. Are they colorful? Are they spotted? Are they striped? Are they in a gradient? Do they have scales? Do they have eyes? You can get playful and make one super long one or many tiny ones. You can make a simple, colored fish, a rainbow fish, a collaborative fish where everyone makes a different section, or try unlimited ways to assemble the fish body. There is no wrong answer here; the idea is to feel inspired and have fun.


As mentioned in Step 2, use the flatter parts of your scraps to cut out a slight tail shape and paint that on both sides.
Set that all out to dry in a safe place.
Step 4:
Once dry, take the awl or drill and carefully make a small hole at the top of the little carton. Repeat this step for as many cartons as you’ve painted. Make a little hole at the top of the fish tail, too. Make sure the hole is big enough for your string to go through, but small enough that when you tie your knot nubs, the knot acts as a stopper for the little carton.
Step 5:
Take your string and tie a series of knots on top of one another to create a little nub at the bottom. This nub will be used as a stopper as you start stringing your carton pieces together.
Step 6:
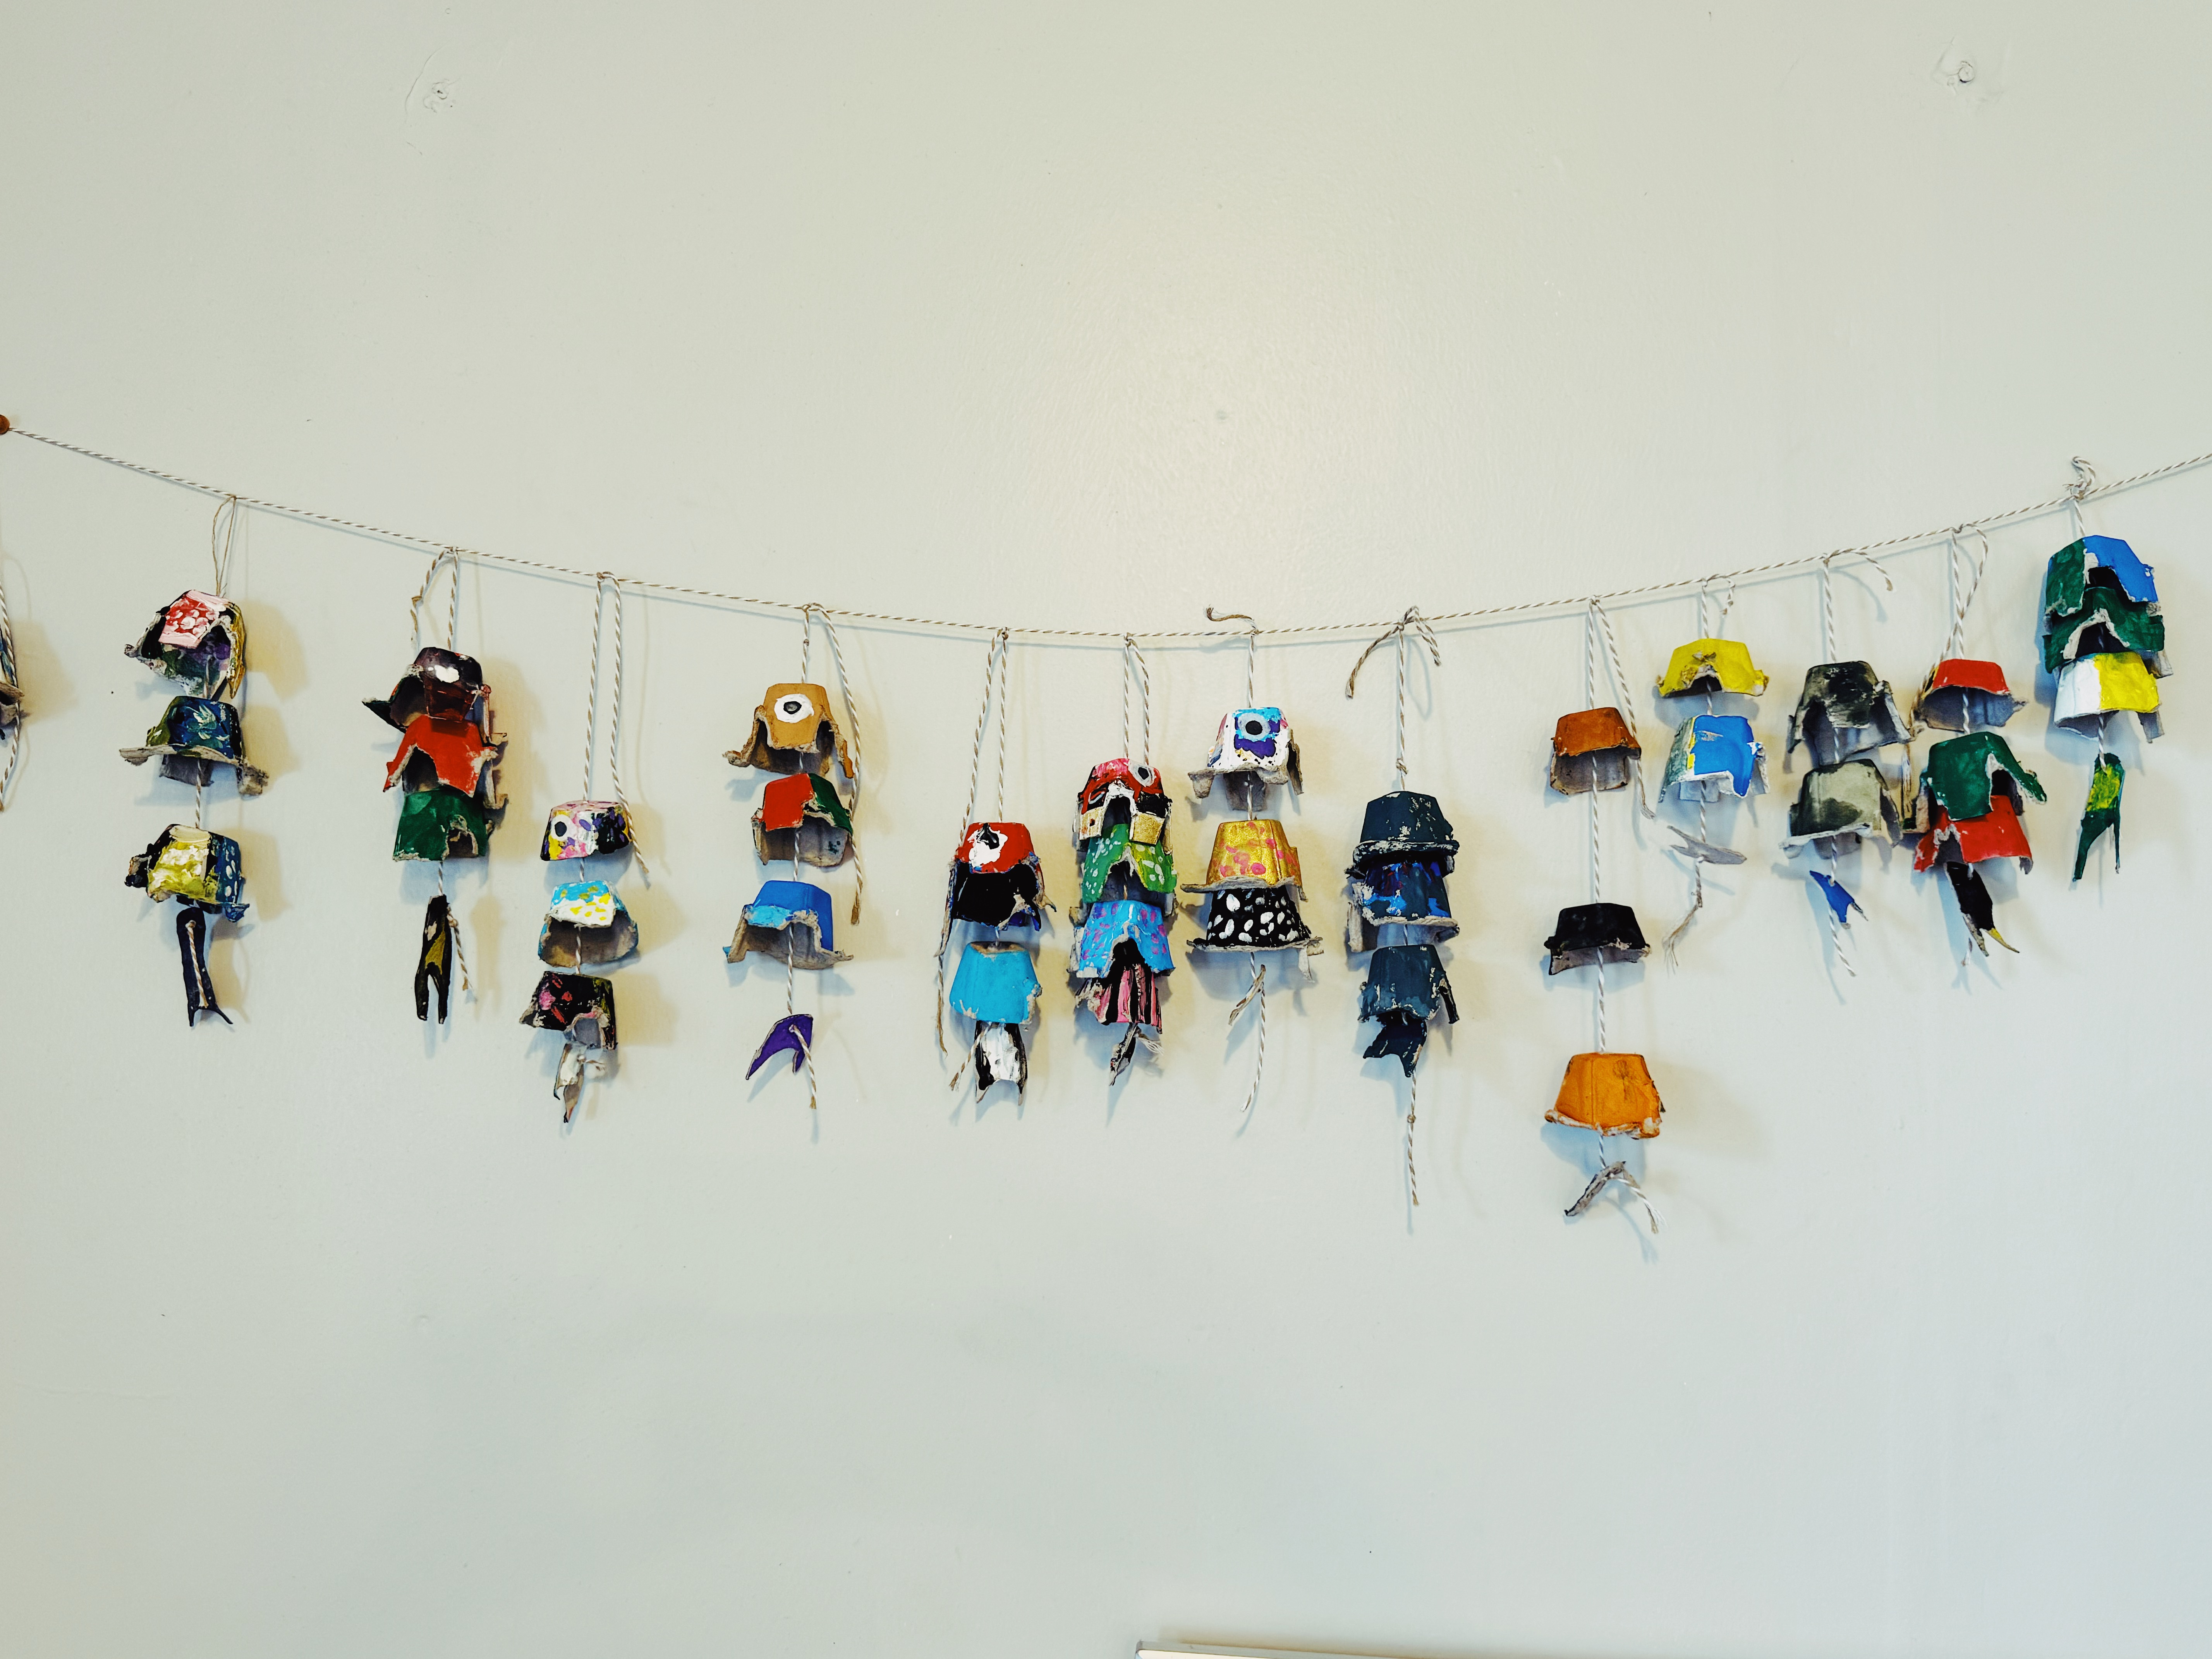
String your fish tail as the first component and use the little knot as a stopper.
Step 7:
Go up on the string about an inch and continue step 6. Keep stringing the egg carton shapes you’ve painted in whatever pattern you’ve chosen for your fish. The idea is to make the nub, string the carton, make a nub, string the carton, and go on and on until you are ready to do the head as the last one. They should stack nicely, slightly hovering over the previous one. Be sure to leave the one with the eyes for the strand's top, as we work our way from the bottom of the fish (tail) to the top. (head)
Step 8:
Once you have the fish's body done, pick the top part and paint some eyes if you haven’t already. You can layer white for bolder eyes, let it dry, and then add a little black. Let that dry.
This is a great moment to add any more minor details you want. It’s up to you how intricate or simple you want your fish to be, but once everything is painted and dry, you can go in with a finer Sharpie or fine paint marker and add small details like patterns or textures.
Step 9:
You can hang other elements like rope or netting, make a cardboard ocean, make a fishing rod out of cardboard or a stick, make a lot of fish and hang a school of them somewhere, make a garland, give them as gifts, decorate gifts, or hang them in your car. Our kids love hanging them in their room near their beds.
Most importantly, have fun! If you make these, please share them with us. We would love to see your creations. Enjoy!
Def going to try this!